By Vikas (Mechanical Engineer)
Fire Fighting Robot Project Hindi: नमस्कार दोस्तों, मेरा नाम विकास (उर्फ अमल कुमार) और मैं सीतापुर के एक गाँव मे रहता हूँ और मैंने Mechanical Engineering से B.Tech किया है और आज मैं आप आपके लिए एक बहुत ही इंटरेस्टिंग और प्रैक्टिकल प्रोजेक्ट लेकर आया हूँ Fire Fighting Robot। यह प्रोजेक्ट खास तौर पर beginners के लिए है, जिसे आप आसानी से समझकर बना सकते हैं।
Fire Fighting Robot क्या होता है?
दोस्तों , आपको बता दें कि Fire Fighting Robot एक ऐसा ऑटोमैटिक या सेमी-ऑटोमैटिक रोबोट होता है जो आग (fire) को detect करके उसे बुझाने का काम करता है। इसमें sensors और motors का इस्तेमाल होता है जिससे यह आग के पास जाकर पानी या CO₂ से उसे control करता है।
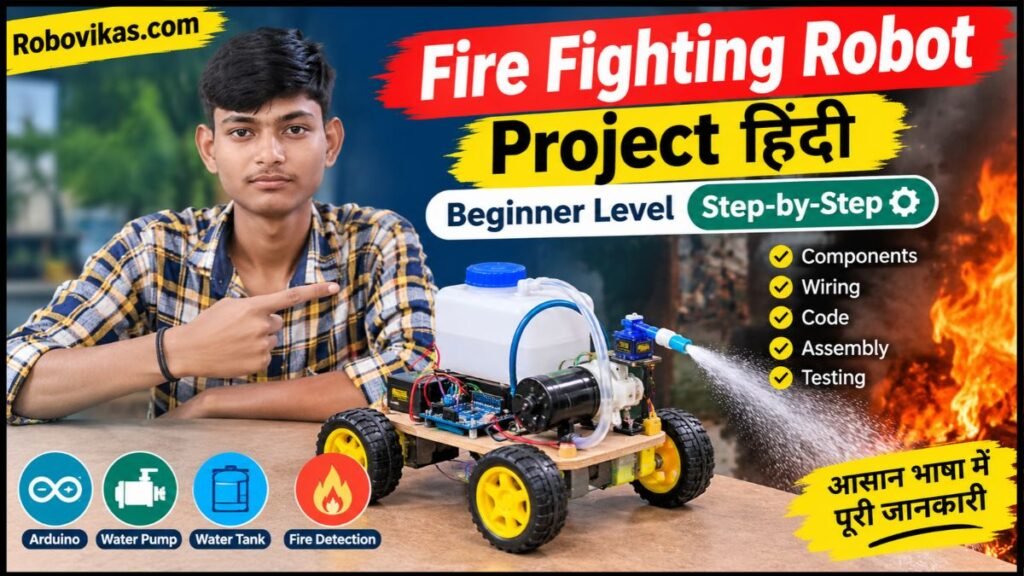
इसे बनाने के लिए जरूरी Component कौन कौन से है?
| Component Name | Approx Price (₹) |
|---|---|
| Arduino UNO | 250 – 400 |
| Flame Sensor | 80 – 150 |
| DC Motors (2) | 200 – 300 |
| Motor Driver (L298N) | 150 – 250 |
| Water Pump | 150 – 300 |
| Relay Module | 80 – 120 |
| Battery (9V/12V) | 150 – 300 |
| Robot Chassis | 300 – 600 |
| Jumper Wires | 50 – 100 |
| Breadboard | 80 – 150 |
Total Cost लगभग: ₹1500 – ₹2500

Working Principle (कैसे काम करता है?)
दोस्तों , आपको बता दें जितना आसान इसे बनाना है उतना ही आसान इसका काम है और इसका काम आग बुझाना है।
- भाई इसमे लगा Flame Sensor आग को detect करता है।
- फिर Arduino को signal भेजता है।
- Arduino motor driver को command देता है।
- Robot आग की दिशा में move करता है।
- जब आग के पास पहुँचता है तो पानी का pump ON हो जाता है।
- Fire को बुझा देता है।
Circuit Connection (कनेक्शन कैसे करें?)
- Flame Sensor → Arduino (Analog Pin)
- Motor Driver → Arduino (Digital Pins)
- Motors → Motor Driver
- Relay → Arduino
- Water Pump → Relay
ध्यान रखें: Wiring करते समय polarity (positive/negative) सही रखें।

Arduino Code (Basic Logic):
int flame = A0;
int motor1 = 3;
int motor2 = 4;
int pump = 7;

void setup() {
  pinMode(flame, INPUT);
  pinMode(motor1, OUTPUT);
  pinMode(motor2, OUTPUT);
  pinMode(pump, OUTPUT);
}

void loop() {
  int fire = analogRead(flame);

  if(fire < 300) {
    digitalWrite(motor1, HIGH);
    digitalWrite(motor2, HIGH);
    digitalWrite(pump, HIGH);
  } else {
    digitalWrite(motor1, LOW);
    digitalWrite(motor2, LOW);
    digitalWrite(pump, LOW);
  }
}
Step-by-Step बनाने की प्रक्रिया क्या है?
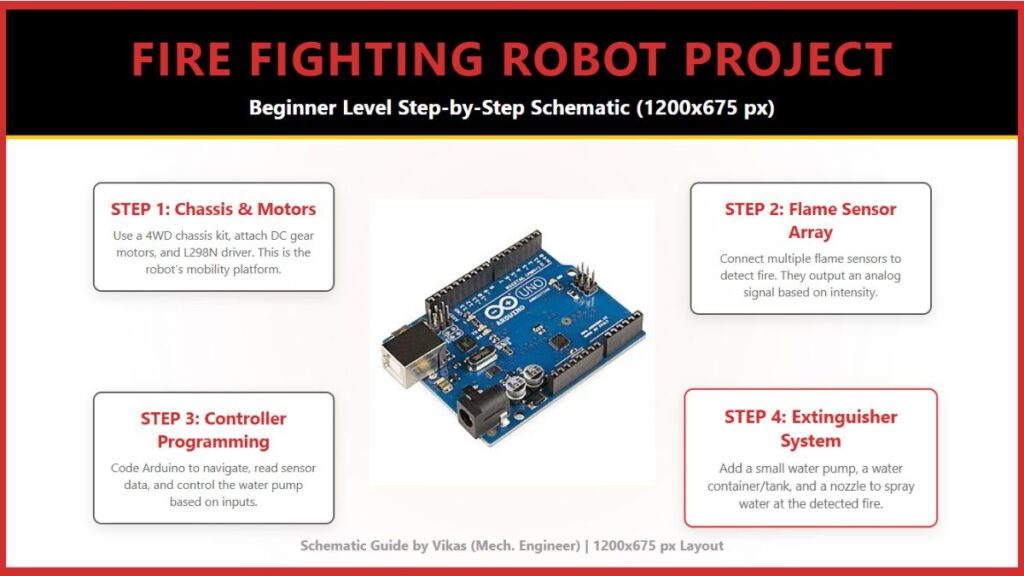
Step 1: Chassis तैयार करें
भाई इस रोबोट को बनाने के लिए सबसे पहले हमे इसकी बॉडी यानि Robot की Chassis बनानी पड़ेगी।
Step 2: Motor Connection
जो मोटर हमे ली है हमे उन Motors को motor driver से connect करना पड़ेगा,
Step 3: Sensor लगाएँ
Flame sensor को robot के आगे की तरफ लगाएँ ताकि वह आसानी से आग detect कर सके।
Step 4: Pump Setup
Water pump को relay के साथ जोड़ें और पानी की पाइप लगाएँ।
Step 5: Arduino Programming
उसके बाद आप Arduino की Programming करे क्योंकि प्रोग्रामिंग सबसे जरूरी है। अगर नहीं आती है तो अपर दिया गया कोड Upload करें।
Step 6: Testing
Robot को चालू करें और छोटी flame के सामने टेस्ट करें।
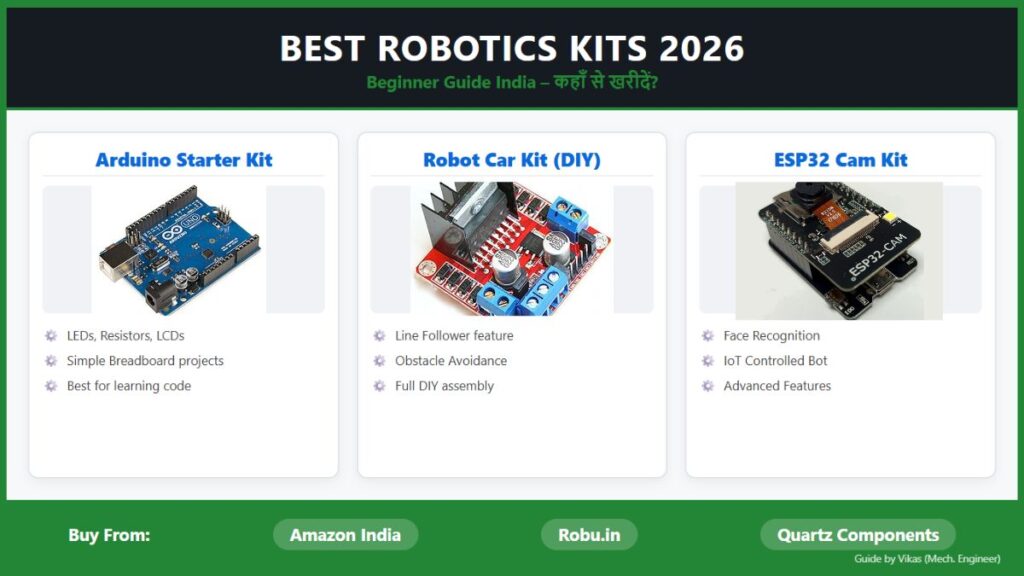
Also read – Best Robotics Kits for Beginners India 2026 – कहाँ से खरीदें?
Fire Fighting Robot की Safety बहुत जरूरी है?
दोस्तों , आपको बात दें की Fire Fighting Robot बनाते समय हमे अपनी safety का ध्यान रखना बहुत जरूरी है, खासकर क्योंकि इसमें battery, motors, wiring, water pump और fire सभी शामिल होते हैं।
- Wiring check करें: Power देने से पहले सभी wires और connections को अच्छी तरह check करें।
- Battery polarity देखें: Positive और negative connection उल्टा न लगाएं।
- Arduino को direct load न दें: Motor और pump को Arduino pin से सीधे connect न करें।
- Water से electronics बचाएं: पानी Arduino, motor driver और खुले wires पर नहीं जाना चाहिए।
- Pump को secure करें: Water pipe और pump को अच्छी तरह fix करें ताकि leakage न हो।
- Fire test छोटा रखें: शुरुआत में बहुत छोटी और controlled flame से testing करें।
- ज्वलनशील सामान दूर रखें: Testing area के आसपास paper, cloth, petrol या दूसरी flammable चीजें न रखें।
- Robot को अकेला न छोड़ें: Fire testing के दौरान हमेशा कोई व्यक्ति मौजूद रहे।
- Emergency में power बंद करें: कोई problem होने पर सबसे पहले battery disconnect करें।
- Professional firefighting के लिए नहीं: यह beginner project मुख्य रूप से learning और demonstration के लिए है।
Fire Fighting Robot का Use यानि इस्तेमाल क्या है?
भाई यह robot मुख्य रूप से robotics, electronics और automation सीखने के लिए बनाया जाता है।
- School Science Project: School exhibition में demonstrate कर सकते हैं।
- College Project: Engineering और robotics project के रूप में उपयोग किया जा सकता है।
- Robotics Exhibition: Robot की automatic fire detection दिखा सकते हैं।
- Arduino Learning: Sensor और motor control को practically समझ सकते हैं।
- Automation सीखने में मदद: Sensor के input के आधार पर robot action लेना सीखता है।
- Future Upgrade: इसमें obstacle avoidance, camera, Wi-Fi और remote control जोड़ा जा सकता है।
- Prototype Development: आगे advanced firefighting robot बनाने की basic foundation मिलती है।
Fire Fighting Robot Project – FAQs
1. Fire Fighting Robot क्या है?
यह एक robotic prototype है जो sensor की मदद से flame detect करके पानी spray करने की कोशिश करता है।
2. क्या यह बड़ी आग बुझा सकता है?
Beginner robot को बड़ी या uncontrolled fire के लिए इस्तेमाल नहीं करना चाहिए। यह मुख्य रूप से educational project है।
3. इसमें Arduino का क्या काम है?
Arduino sensor से input लेकर motors और water pump को control करता है।
4. Flame Sensor क्या करता है?
Flame sensor आग से आने वाले infrared signal को detect करके Arduino को information देता है।
5. क्या Pump को Arduino से direct जोड़ सकते हैं?
नहीं, सामान्यतः pump के लिए relay, transistor या suitable motor-driver circuit का इस्तेमाल किया जाता है।
6. Fire Fighting Robot को test कैसे करें?
पहले motors और sensors को अलग-अलग test करें। उसके बाद water pump check करें और अंत में controlled flame से demonstration करें।
7. क्या पानी से robot खराब हो सकता है?
हाँ, अगर पानी electronic components या exposed wiring पर पहुंच जाए तो circuit damage या short circuit हो सकता है।
8. क्या इसमें obstacle avoidance लगाया जा सकता है?
हाँ, ultrasonic sensor लगाकर robot obstacles को detect कर सकता है।
9. क्या robot को mobile से control कर सकते हैं?
हाँ, Bluetooth या Wi-Fi module की मदद से remote control feature जोड़ा जा सकता है।
10. इस project का सबसे बड़ा फायदा क्या है?
इससे Arduino, sensors, motors, programming और robotics automation को practically समझने का मौका मिलता है।
Conclusion: Fire Fighting Robot Project Hindi
दोस्तों , आपको बता दें कि यह Fire Fighting Robot project beginners के लिए बहुत अच्छा है। इससे आप Arduino, sensors और automation की basic समझ develop कर सकते हैं।
अगर आप इसे और advance बनाना चाहते हैं तो आप इसमें Bluetooth control, camera module या AI based detection भी जोड़ सकते हैं।
अगर आपको यह article पसंद आया हो तो जरूर try करें और अपने experience share करें।
आपका दोस्त,
विकास (Amal Kumar)
Mechanical Engineer

Pingback: AI Robot Kaise Kaam Karta Hai? Step-by-Step Hindi Tutorial 2026 – robovikas.com